Introduction
Autonomous Wave Control (AWC) allows you to set up and manage your wireless access points (APs) from the GUI of an AlliedWare Plus™ device that supports this functionality by utilizing Vista Manager mini. AWC uses wireless intelligence to model where your APs are located and what their signal strength is. Using this information, AWC automatically optimizes wireless output and channel selection. It minimizes coverage gaps and reduces AP interferences. This results in a high-quality wireless performance that responds to network configuration changes and bandwidth demands from user devices. Vista Manager mini is useful for smaller wireless networks that may not need the capabilities of Vista Manager EX. Vista Manager mini is built into the device GUI, and is available for x950, x930, x530, SwitchBlade x908 Generation 2 switches, and AR Series UTM Firewalls and VPN Routers.
-
AR-Series UTM Firewalls and VPN Routers running version 5.4.8-x.x or later.
-
The number of APs a device can manage is:
-
A maximum of 5 APs for free.
-
More than 5 APs requires a subscription-based feature license. For more information on licenses, go to Allied Telesis, search for Wireless Controllers and select your device’s datasheet.
-
Allied Telesis supports the following APs:
-
TQ Series: TQ5403, TQm5403, TQ5403e, TQ3400, TQ3200, TQ2450 (must be running software version 4.0.5 or later), TQ1402, TQm1402.
-
MWS Series: MWS2533, MWS1750, MWS600 (must be running AlliedWare Plus software version 2.2.3 or later).
Configuring a Multi-Channel Wireless Network
The device GUI includes Vista Manger mini and a Wireless Setup menu, which allows you to set up your wireless network, monitor and configure the network, and manage AWC. You can use the Auto Setup feature or set up AWC manually. These two methods are described next:
Auto Setup
From release 5.4.8-1.2 onwards, you can set up your AWC managed network automatically using Auto Setup. Auto Setup makes wireless deployment simple. The Auto Setup feature is available on the AR3050S, and AR4050S devices.
The Auto Setup feature:
-
discovers APs and automatically creates a configuration using their IP and MAC addresses.
-
configures AP profiles based on the model name.
-
creates the wireless network and security using defined default values.
Perform the following steps to automatically set up your AWC managed wireless network:
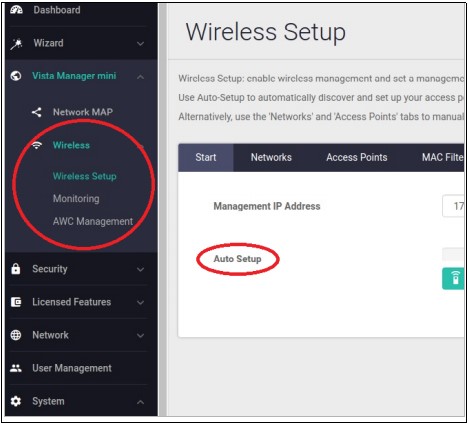
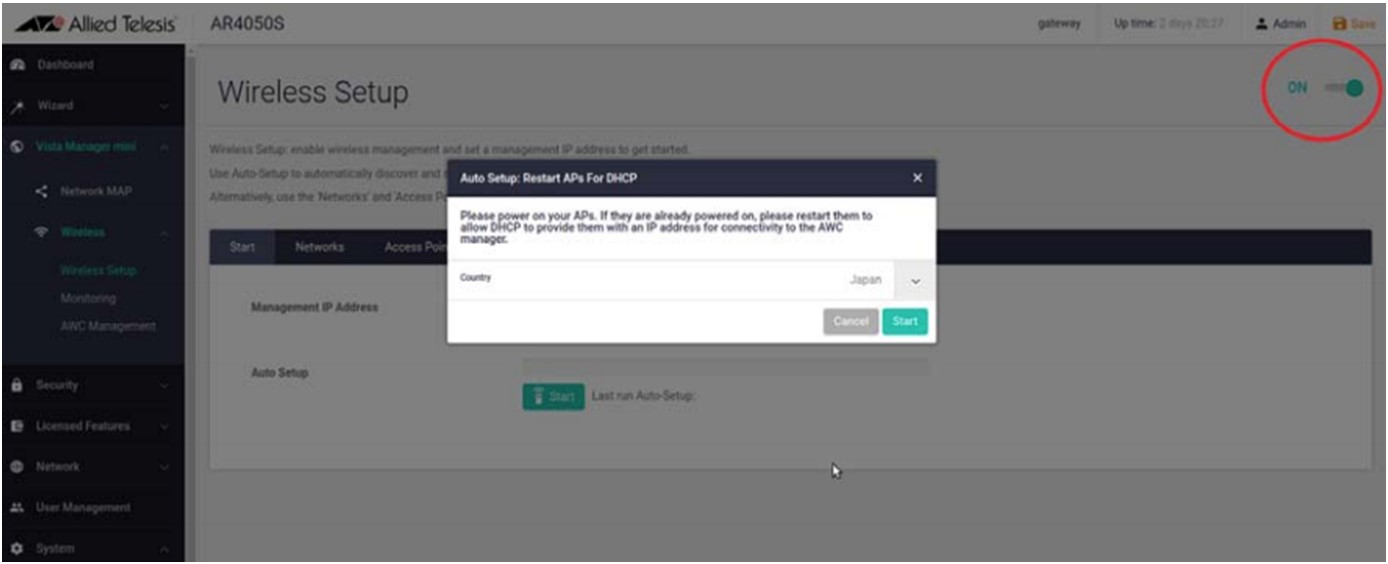
1. Click on Wireless Setup from the Vista Manger mini menu, then turn on wireless using the off/on button (at top right of window) to enable wireless management. You may get a notification to power on your APs to allow DHCP to provide an IP address for connectivity to the AWC manager.
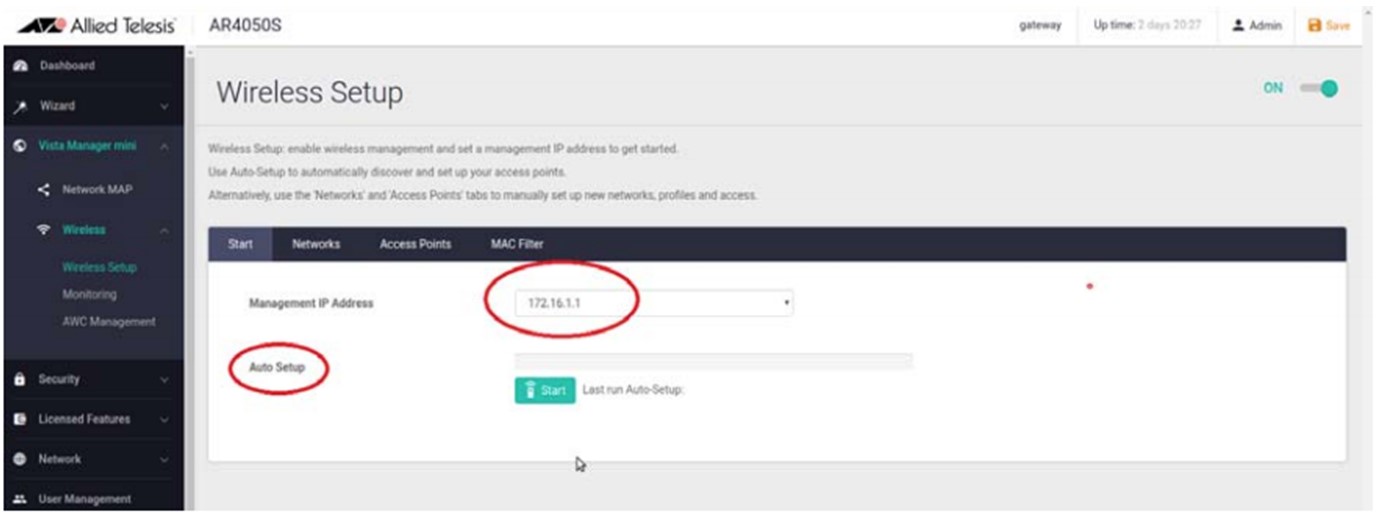
2. In the Wireless Setup Start tab, enter a Management IP Address. This is an IP address on the device you are on. AWC will use this IP address to communicate with APs in your network.
3. Use Auto Setup to automatically discover and set up your access points. Click the green Start button, then select your country, for example United States:
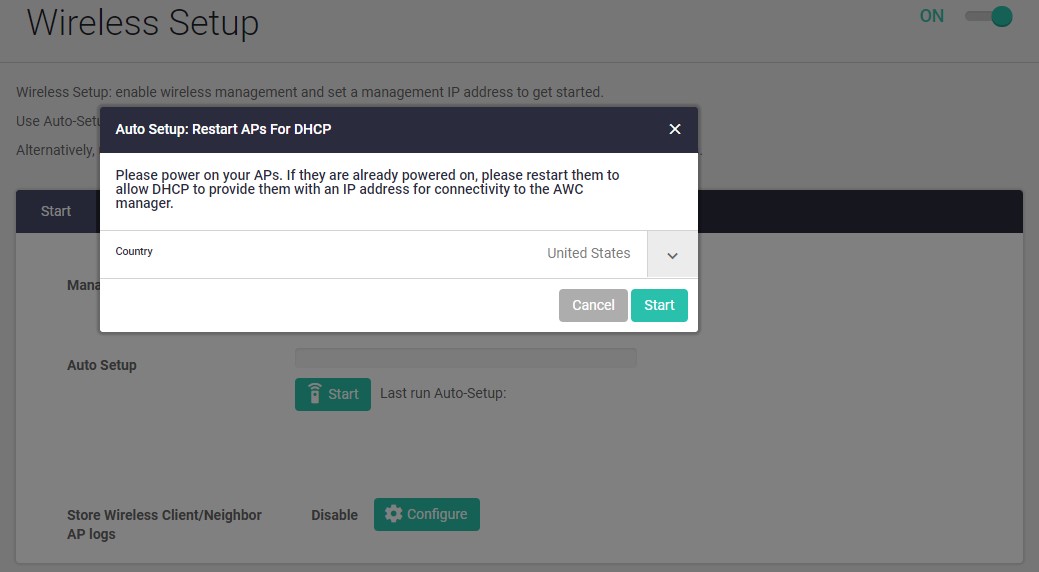
4. Click Start to proceed with auto discovery.
5. When the auto discovery is complete you will see this dialog.
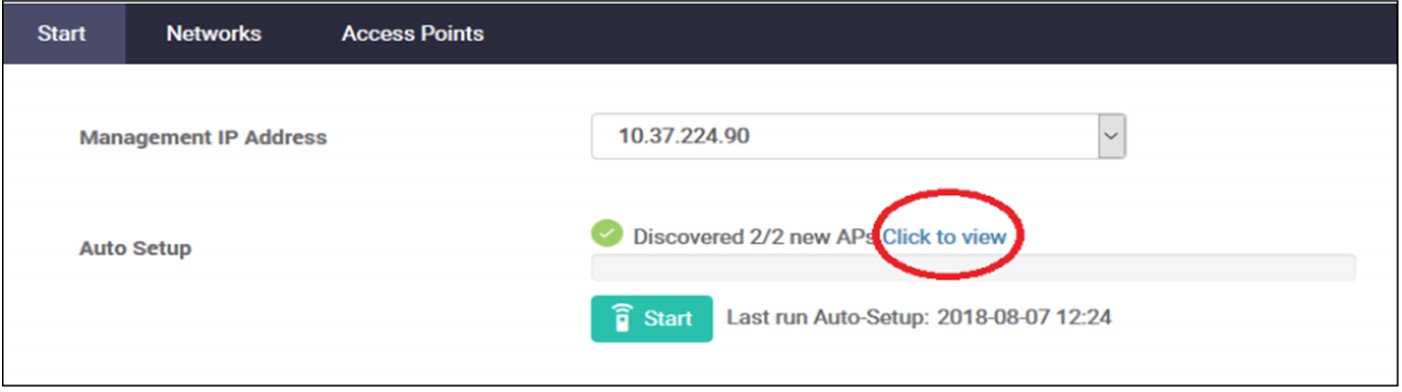
6. To see the automatically discovered APs, select Click to view.
7. This will take you to the Monitoring page, where you can select an AP and perform an action, such as Refresh, Apply Config, Reboot or Update Firmware.
Review Auto Setup
After the Auto Setup process is complete. You can go through each tab to review the default configured profile. If the auto default setting needs to be changed, refer to the steps under the "Manual Setup" for the appropriate tab and edit the entries. Once changes have been saved/applied, then return to the Monitoring page and apply new Config to the appropriate APs.
Manual Setup
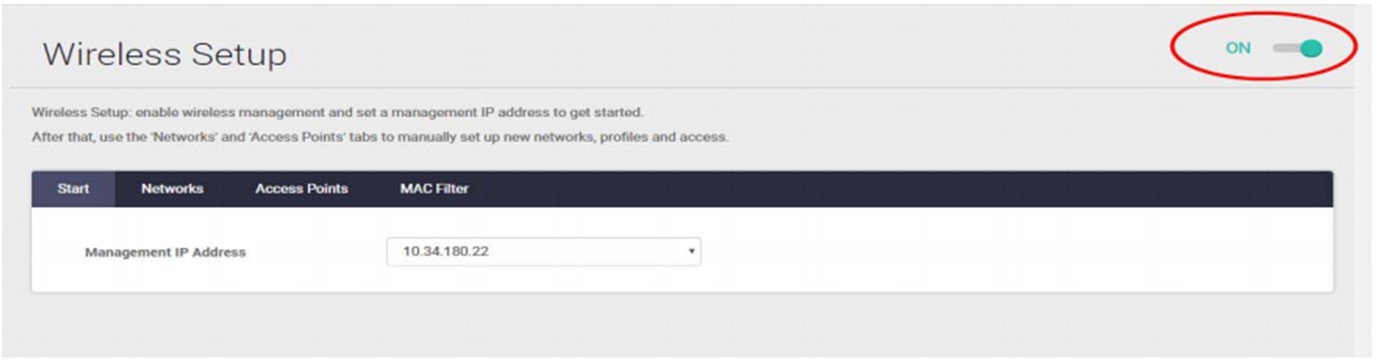
Set a management IP address to manually set up your network, go to the Wireless Setup menu:
1. Click on Wireless Setup, then click the off/on button to enable wireless management.
2. Select a Management IP Address. This is an IP address on the device you are on. AWC will use this IP address to communicate with APs in your network:
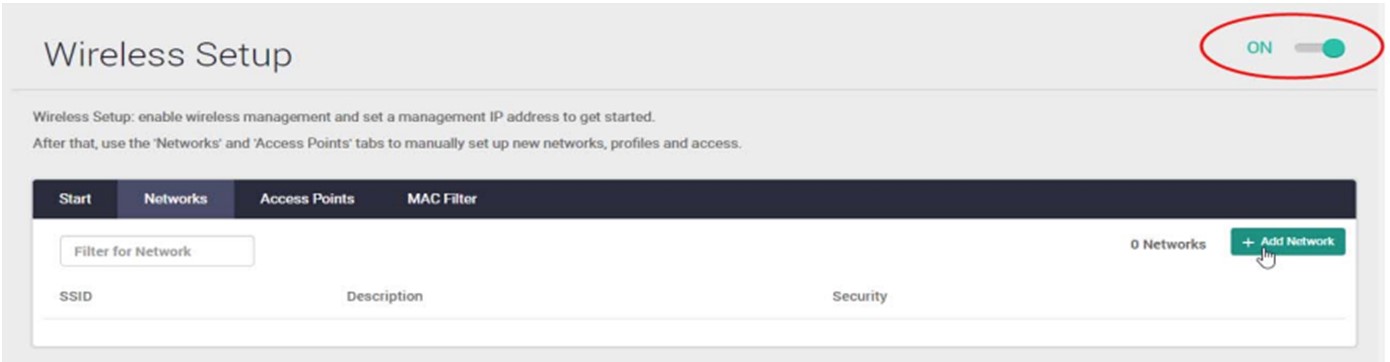
Add a network
1. From the Networks tab, click +Add Network:
2. Add an SSID Name, and Description, and select the desired security level for your wireless network.
3. Optionally, select a Security type and enter a Key to join the network.
4. Click Apply.
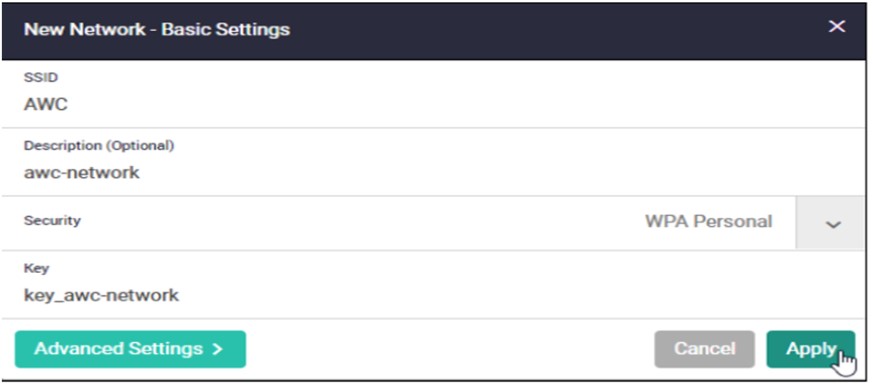
5. The Advanced Settings button provides network General, Security, and Fast Roaming configuration.
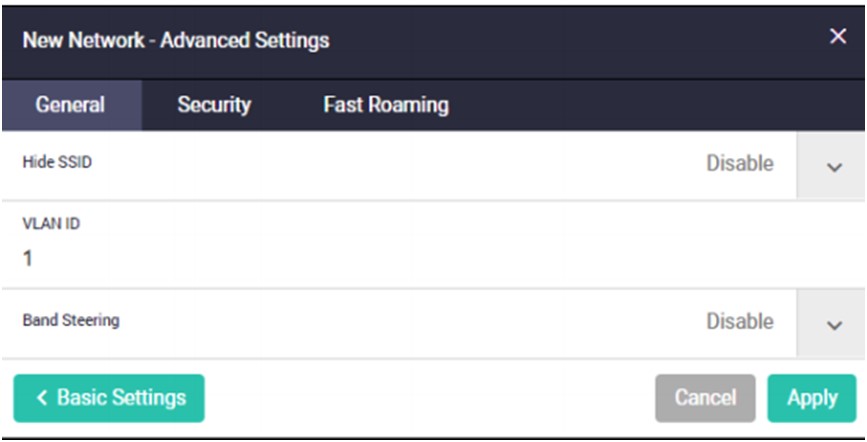
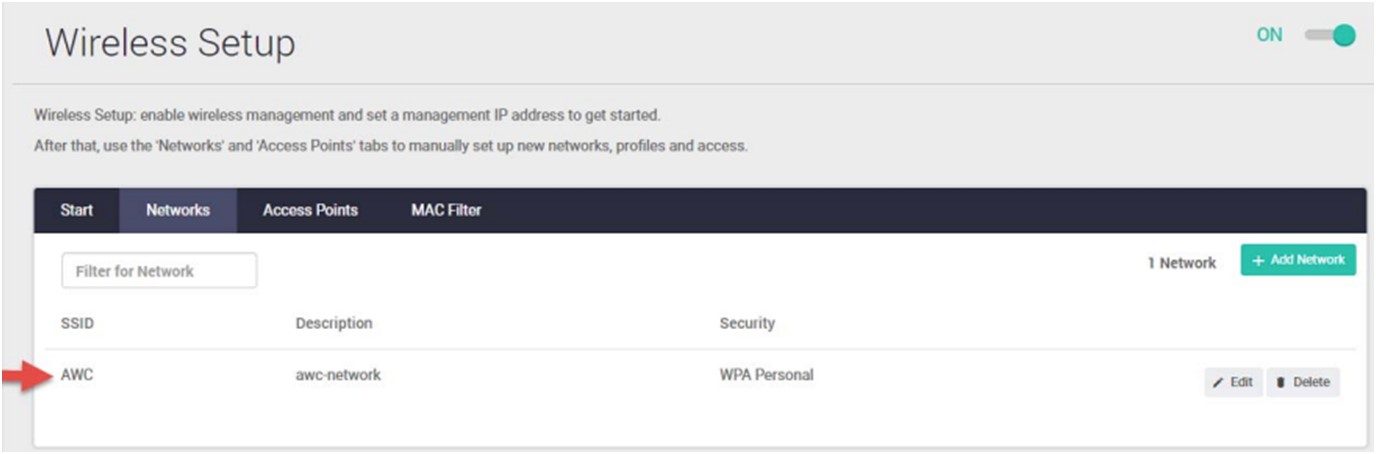
6. Click Apply to complete this step.
7. In the Networks tab, SSID list, you can see the example network created called ‘AWC’.
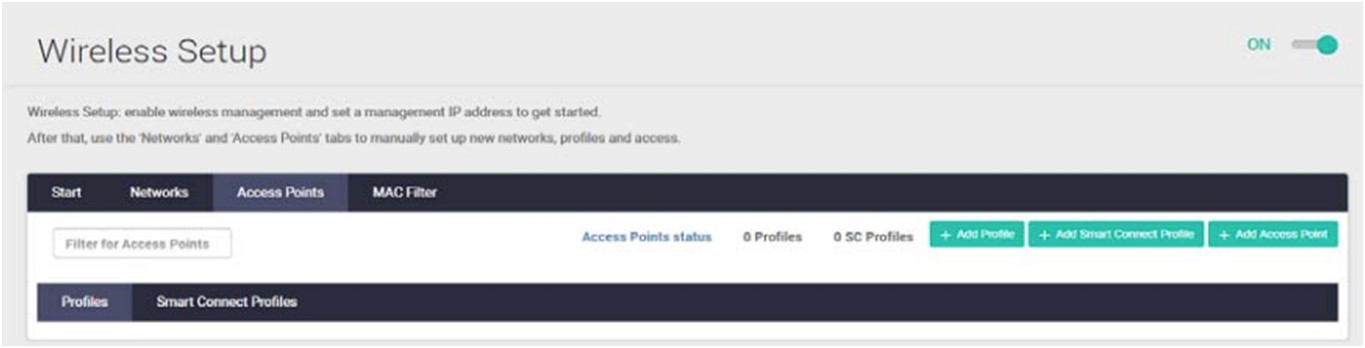
Create an access point profile for the AP series
1. Click on the Access Points tab, then click +Add Profile:
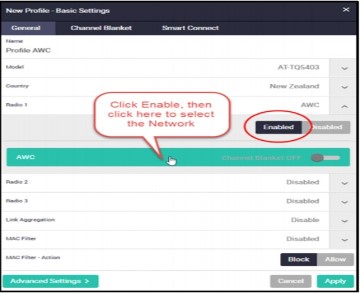
2. Create a profile for each series of AP being used, for each series:
-
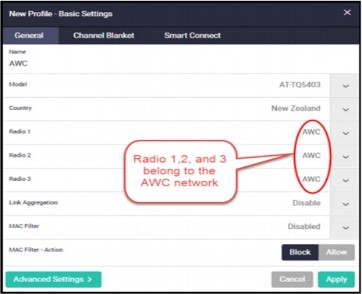
In the New Profile Basic Settings dialog, add a Profile Name, select the AP model, Country, then Enable each internal radio (Radio1, 2, and 3).
-
This example uses the TQm5403 AP, which contains three IEEE 802.11 2ss internal radios to enable concurrent Wi-Fi communications: one at 2.4GHz band, and two at 5GHz band.
-
Make sure you click on the network name (the network is ‘AWC’ in our example below). The field will turn green in color when selected correctly.
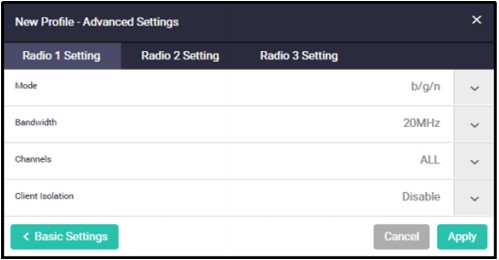
3. Use the Advanced Settings to configure: Mode, Bandwidth, Channels, and Client Isolation options for each Radio.
4. Click Apply to save your selections.
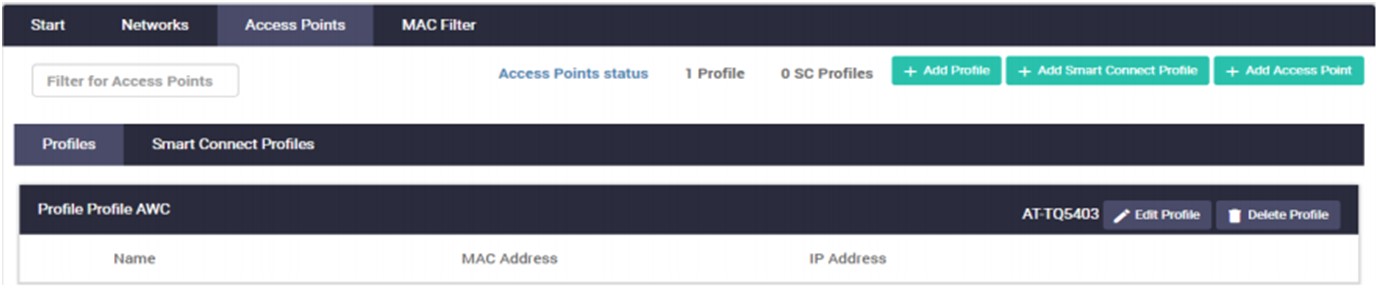
5. You can now see the newly created AP profile (‘Profile AWC’ in example below):
Add APs to the access point profile
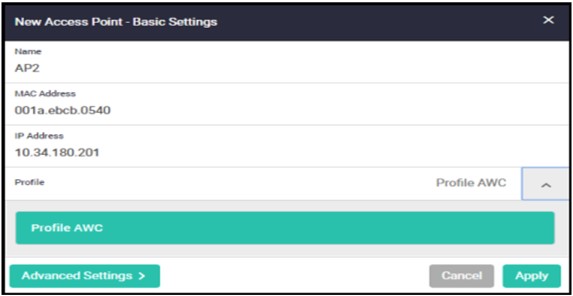
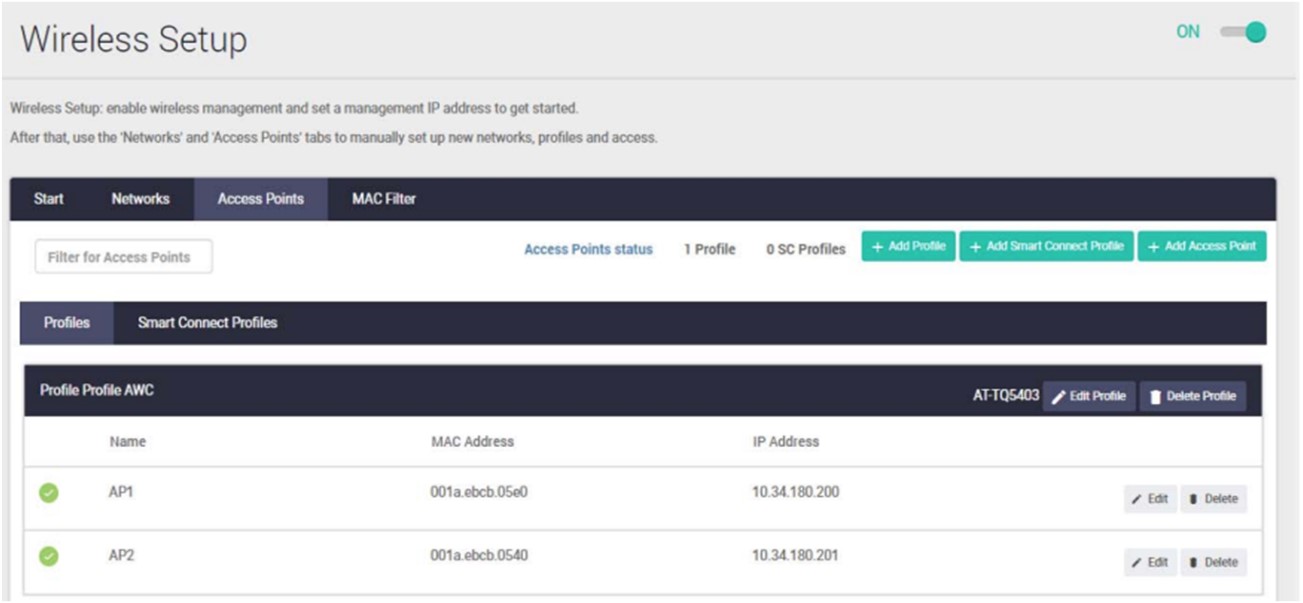
1. Click on the Access Points tab, then click +Add Access Point.
2. Enter the AP Name, MAC Address, and IP Address, and then select the Profile for your AP:
3. The Advanced Settings button provides additional internal radio settings: Status, Channel and Power:
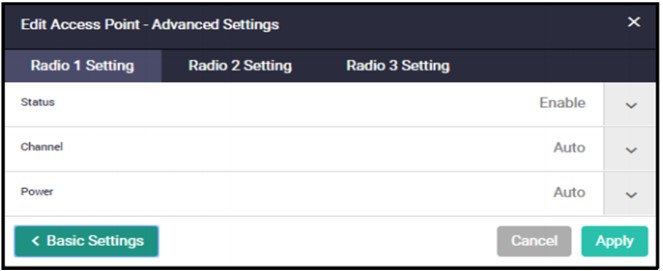
4. Click Apply to complete this step.
5. You can now see the newly added access points listed under the AP profile they have been assigned to. In the example below, AP1 and AP2 are listed under the profile called: Profile AWC.
Manually change the password of an AP's managed under AWC lite/Vista Manager Mini
When a TQ series AP is managed by AWC lite/Vista Manager Mini, the password will be over written by the configuration on AWC lite/Vista Manager Mini, if not configured, it will revert to default username and password.
Changing the password
To change the password on an AP managed by AWC lite/Vista Manager Mini, use the command below:
awplus> enable
awplus# configure terminal
awplus(config)# wireless
awplus(config-wireless)#ap <1-65535>
awplus(config-wireless-ap)# login username USERNAME password PASSWORD