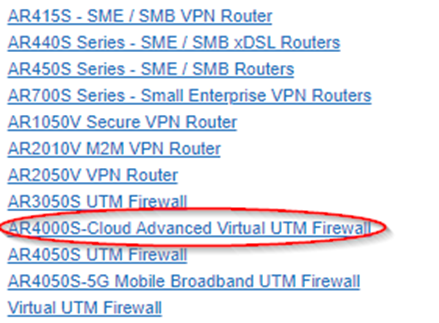
Introduction
AR4000S-Cloud has become increasingly popular due to its ease of use and deployment. However, before a license was uploaded to AR4000S-Cloud it requires DHCP (Dynamic Host Configuration Protocol) to obtain an IP address and be accessed as manual assign IP is unavailable before an AT-AR4-VPN10S-xYR or AT-AR4-VPN10H-xYR is applied.

In this article, we will walk you through the step-by-step process of installing an AR4000S-Cloud in your local virtualizing environment, ensuring a seamless setup experience. By the end, you will have a clear understanding of the necessary procedures, enabling you to leverage the power of virtualization effortlessly.
Installation
Step 1: Choose a Virtualization Platform
Before diving into the installation process, it is important to select a virtualization platform that is supported by the AR-4000. include Amazon AWS or Microsoft Hyper-V. If AWS is the platform of your choice, please follow the instructions from the following link:
Installation Guide: AR4000S-Cloud on Amazon Web Services (AWS)
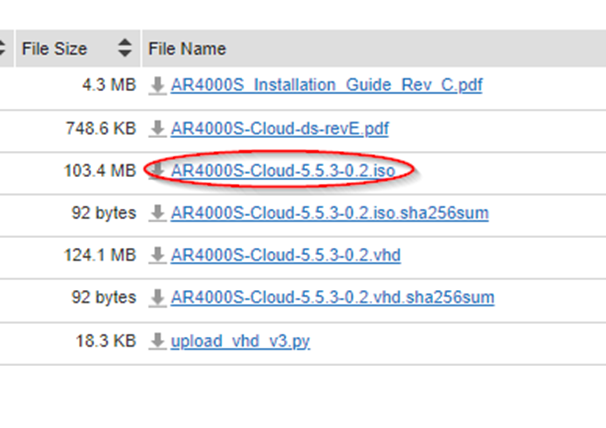
Step 2: Download the AR4000S-Cloud
Identify the AR4000S-Cloud and download the necessary files. These files come in the form of an ISO, provided by Allied Telesis. Make sure to obtain the correct version compatible with your virtualization platform.
Step 3: Upload the image onto the virtualization platform.
Once you have downloaded the AR4000S-Cloud image, upload it to the virtualization platform in preparation for the installation.
Step 4: Create a New Virtual Machine
Click on the "New Virtual Machine" option within the virtualization platform. Follow the wizard or prompts that appear, ensuring that you choose the appropriate settings for the virtual machine. Select the downloaded AR4000S-Cloud file as the source for the virtual machine.
Step 5: Configure Networking
During the virtual machine creation process, you will reach a stage where you can configure networking settings. Choose the network with a DHCP server available. This will allow the AR4000S-Cloud to obtain an IP address automatically.
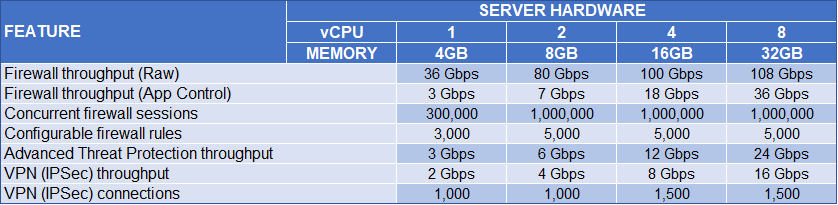
Step 6: Allocate System Resources
Specify the amount of memory, CPU cores, and storage space to allocate to the virtual machine. Consider the system requirements listed below and adjust the settings accordingly. Once configured, proceed with the virtual machine creation. Only 4GB of storage is required.
Performance
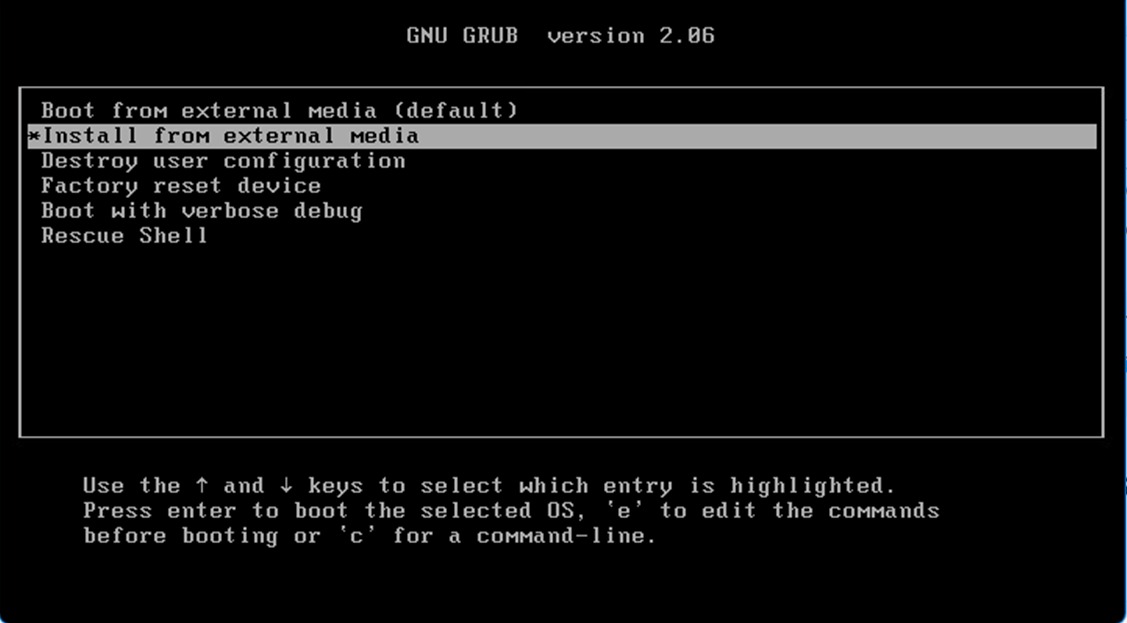
Step 7: Power on the Virtual Machine
After the virtual machine is created, click on the "Power On" or "Start" button within the virtualization platform to boot up the AR4000S-Cloud. Wait for the operating system to load, which might take a few moments. Choose to install from external media, this is to install the content of ISO onto the virtual storage, so future reboot doesn’t need to be specified to the ISO.
Step 8: Once AR4000S-Cloud is up, you will need to find its IP address, this can be obtained by viewing the DHCP binding as well as using the command "show ip interface"

Open a browser session to its IP address to access the GUI of the AR4000S-Cloud. Login with default username manager and password friend.
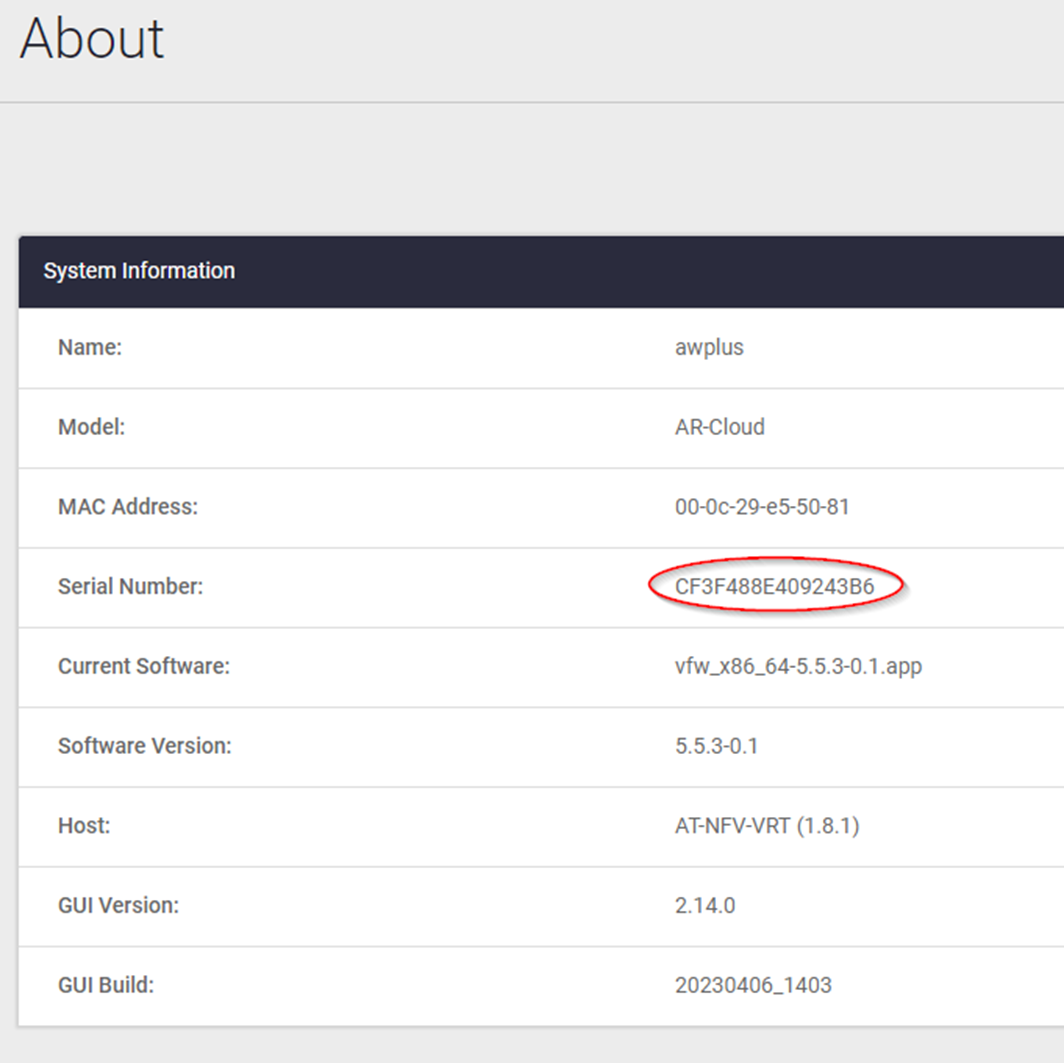
Obtain the serial number from System > About, and provide it to Allied Telesis TAC to generate the license.
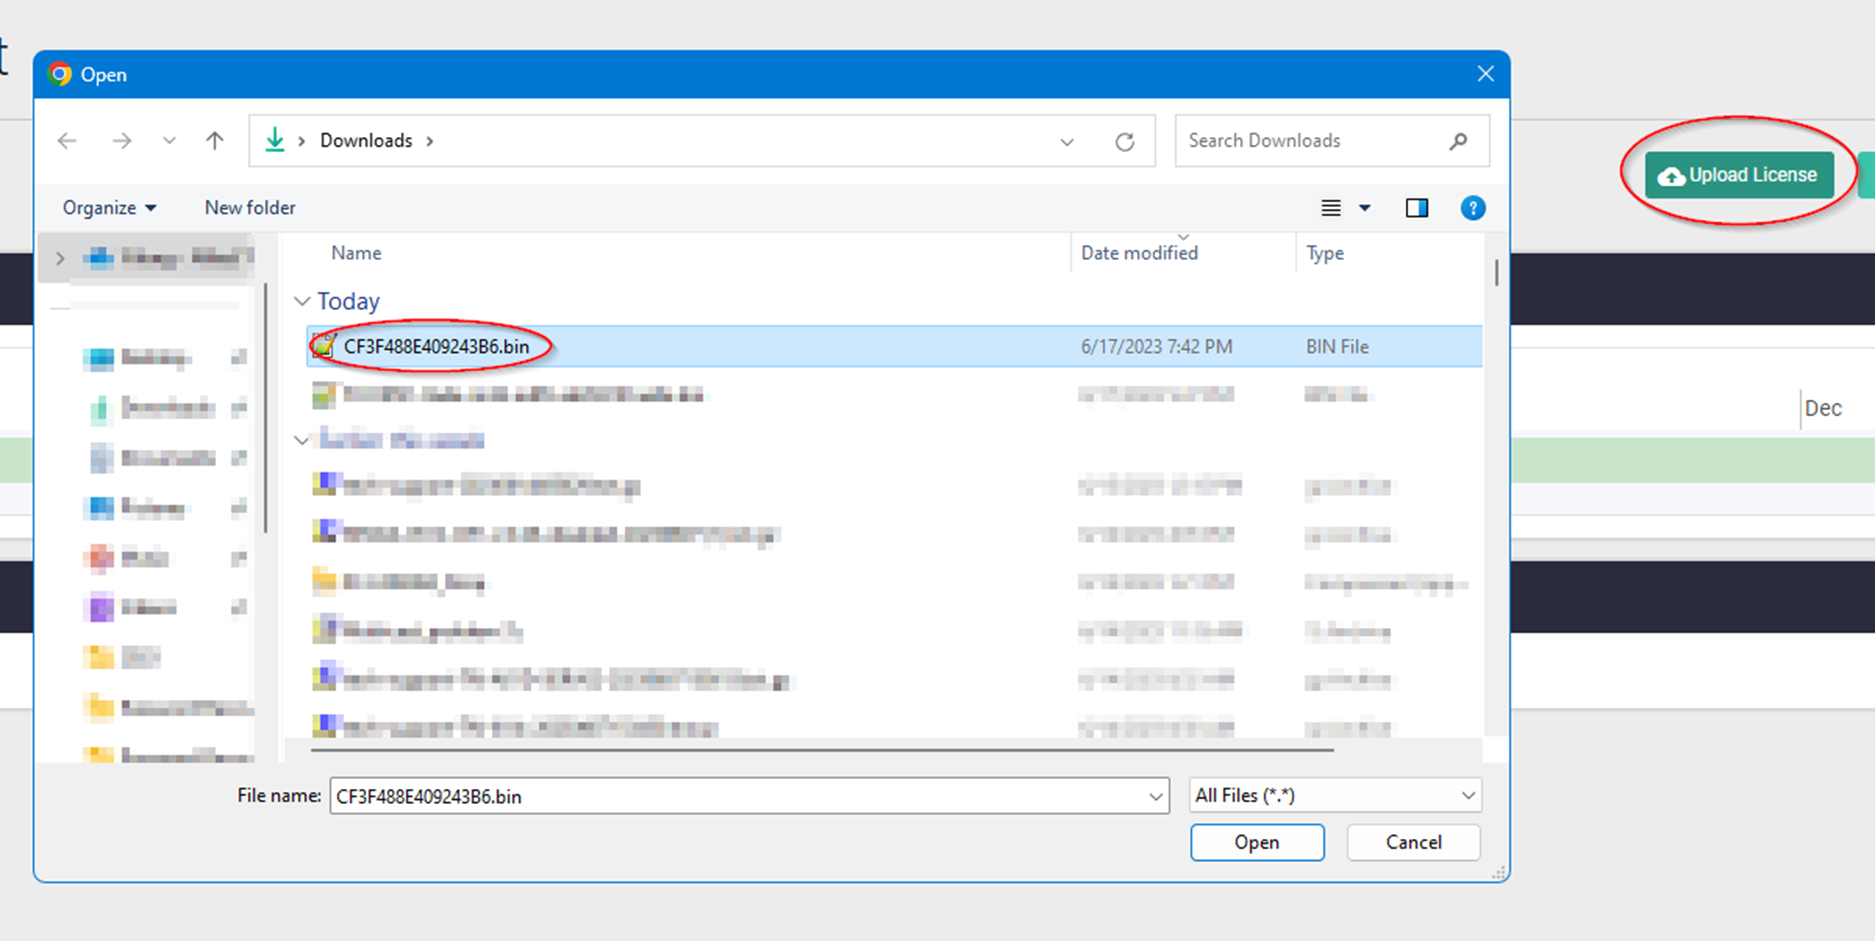
Once the license is issued, Go to System > License Management, and use the "Upload License" option to upload the issued license.
Now you can start to use the AR4000S-Cloud as a fully functional UTM firewall.
Conclusion
Setting up an AR4000S-Cloud is a straightforward process when following the guide. By carefully selecting the virtualization platform, downloading the appropriate AR4000S-Cloud files, and configuring networking settings, you can successfully install the AR4000S-Cloud and harness its capabilities. Remember to allocate system resources appropriately and complete any additional configuration steps to ensure a fully functional setup. With this guide in hand, you can confidently deploy AR4000S-Cloud, unlocking the benefits of virtualization for your specific needs.